How Do You Screenshot on the Mac: Step-by-Step Guide
Stop guessing! capture any Mac screen in one quick key press and share it like a pro.
Doesn’t matter if you are saving a design mockup, screenshotting an error to send to tech support or you are just a tech newbie, sometimes taking a screenshot on a new device can feel like solving a frustrating puzzle. Knowing the proper shortcut keys makes your life just a little bit easier, you can also save enough time to go doomscroll later.
In this easy and fast guide, you will learn:
- every Mac screenshot shortcut
- how to use the built-in Screenshot toolbar
- how to change where and how your files save
- quick ways to edit and annotate your captures
- professional tools that make the process even faster
Everything here comes straight from Apple’s official documentation and trusted tools like Snagit, we’ve just made it easier for you by collecting them all in one place and getting rid of the technical jargon. By the end, you’ll take cleaner screenshots faster, stay organized, and look like you’ve been doing it for years.
The Three Core Mac Screenshot Shortcuts (What, Why, When)
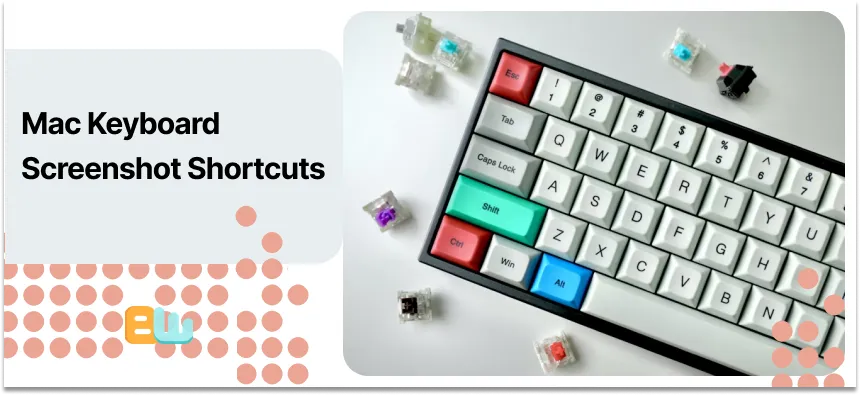
Three shortcuts to memorize: Shift-Command-3, Shift-Command-4, Shift-Command-5.
Taking screenshots on a Mac is faster when you know these three commands by heart. Each shortcut gives you control over what you capture—whether that’s your full screen, a single window, or a custom selection. Once you learn them, you’ll stop reaching for your phone to snap photos of your screen.
1. Shift-Command-3 — Capture the Entire Screen
Press Shift-Command-3 to grab everything you see on your display. This includes your Dock, menu bar, and any open windows. Perfect for full-screen reports or proof of completed work.
2. Shift-Command-4 — Capture a Specific Area
Press Shift-Command-4 and drag your cursor to select the part of the screen you want. It’s best use is when you only need to capture a section like a chart, photo, or chat message.
Pro tip: Press the Spacebar after Shift-Command-4 to switch to window capture mode. Click once, and it saves just that window with a neat shadow effect.
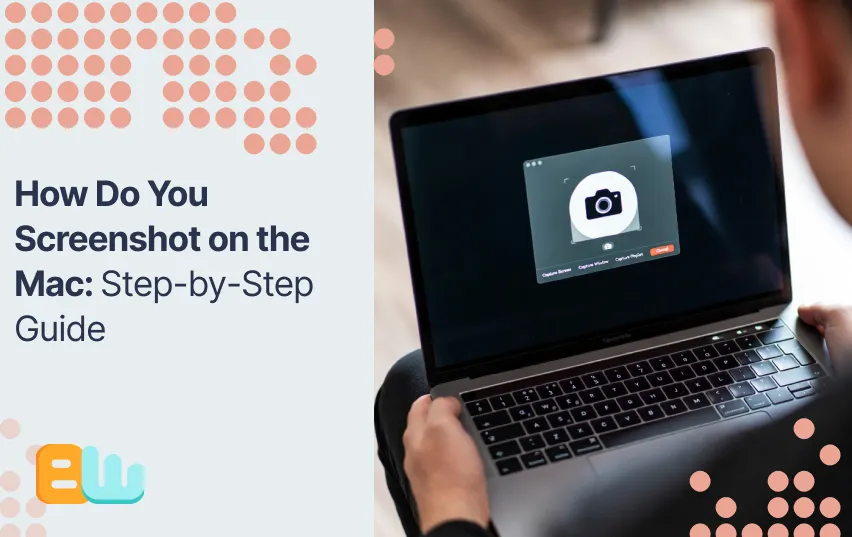
3. Shift-Command-5 — Open the Screenshot Toolbar
This shortcut opens up the Screenshot Toolbar, there you have the option to record your screen, set timers, and choose where to save your files. It’s the most flexible option which makes it great for tutorials or walkthroughs that need more control.
If you have a Touch Bar, pressing Shift-Command-6 to capture it instantly comes in handy when you are sharing app shortcuts or debugging a Touch Bar layout.
By default screenshots are automatically saved to your Desktop. A small thumbnail preview always appears after every screenshot, you can click it to edit your photo or let it disappear.
When to use each:
- Shift-Command-3: For full-screen captures and reports.
- Shift-Command-4: For focused visuals or cropped sections.
- Shift-Command-5: For advanced options and recordings.
Best approach: Master all three. Use Shift-Command-3 for speed, Shift-Command-4 for precision, and Shift-Command-5 for flexibility.
In tech support, for example, screenshots solve problems faster. A support agent can press Shift-Command-4, capture an app error, and send it instantly—clear proof, no back-and-forth emails needed.
Using the Screenshot Toolbar (Shift-Command-5): Options and When to Pick Each
Press Shift-Command-5 and a small control bar appears at the bottom of your screen. That’s the Screenshot Toolbar, your built-in command center for capturing, recording, and saving exactly what you need. It’s available on macOS Mojave and later, so if you’re running an older version, consider updating to unlock these tools.
Here’s what you can do from this toolbar:
- Capture Entire Screen: Takes a full-screen snapshot with one click.
- Capture Selected Window: Grabs a clean shot of one open window.
- Capture Selected Portion: Lets you drag to select a specific area.
- Record Entire Screen: Creates a full-screen video recording.
- Record Selected Portion: Records only a section—perfect for product demos.
- Options Menu: Choose a save location, set a timer, or turn on your microphone for recordings.
- Show Floating Thumbnail: Displays a small preview you can click to edit or drag into another app.
These tools can help your job become much more convenient, for example if you are making a tutorial video you can choose Record Entire Screen while turning on your microphone to narrate as you move about the screen. If you look closely, the toolbar also has a timer which comes in handy when you need to prepare your screen before starting your recording.
Any of these options are a good choice, they all can help you stay organized by giving you the ability to control how and where each image or video is saved. If screenshots are necessary in your work routine, practicing with this toolbar helps make it feel less like a chore and more of an easy part of your workflow.
Save Location, File Formats, and Quick Edits (Practical Settings)
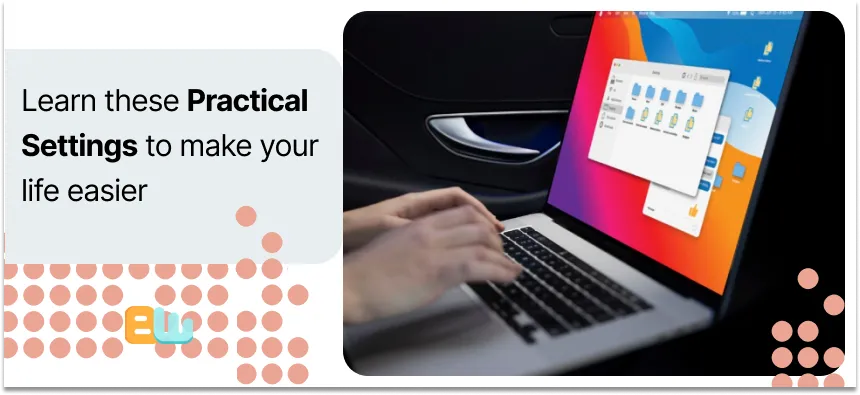
Mac saves every screenshot straight to the Desktop. It’s easy to find but if you take a lot of screenshots it will make your desktop look more busy than that one closet you’ve been avoiding to clean. But there is a good news, It’s easily fixable:
- open the Screenshot Toolbar (Shift-Command-5)
- click Options
- choose a new folder under “Save to”
If you prefer the Terminal route, use this exact command:
“defaults write com.apple.screencapture location /path/to/folder; killall SystemUIServer”
Replace /path/to/folder with your preferred location, for example, /Documents/Screenshots.
Screenshots are automatically saved as PNG files. PNGs look crisp but can be large. To save space or prepare images for web upload:
- open any file in Preview
- choose File → Export to select JPG or PDF.
Power users can change the default file type system-wide with:
“defaults write com.apple.screencapture type jpg; killall SystemUIServer”
This switches all future screenshots to JPG until you change it back.
Quick actions:
- Change your save location using the toolbar or Terminal.
- Export screenshots to JPG from Preview for smaller file sizes.
- Rename and batch-convert files to stay organized.
- Compress large PNGs before emailing.
These small tweaks keep your workspace tidy, your files lightweight, and your screenshots ready for sharing in seconds.
Edit, Annotate, and Pro Tools (From Quick Markup to Snagit)
Once you’ve taken your screenshot, the next step is making it useful. Whether you’re labeling a button, circling an issue, or cropping extra space, Mac’s built-in Markup tools get the job done fast. Just click the thumbnail that appears after taking a screenshot, and you’ll enter the Markup editor where you can:
- crop
- draw
- add arrows
- highlight text
- write notes directly on the image
For more control, open the file in Preview. It offers the same tools but gives you extra flexibility like:
- better color choices
- better text placement
- better saving options.
Use Markup when you are in a hurry; use Preview when you want to take your time and be precise.
If you work with screenshots daily, it’s worth looking at pro-level apps that save hours of editing:
- Snagit: Best for capturing scrolling pages, creating video walkthroughs, and using pre-built templates.
- Shottr: Great for lightweight performance and quick annotations.
- Skitch (Legacy): It was once popular for fast markup but now has become somewhat outdated, you can still use it for simple edits.
You should use built-in tools for quick edits and use Snagit for templates and videos.
For example, let’s say a product manager is preparing release notes, they can snap a window, use Markup to highlight new buttons, and drop comments in seconds. For a polished tutorial, switching to Snagit allows reusable templates, text callouts, and video narration, all in one workflow.
With the right tools, your screenshots become clear, shareable visuals that explain ideas faster than words ever could.
Troubleshooting: Common Problems and Fixes
Even simple shortcuts sometimes act up. Here are quick fixes for the most common Mac screenshot issues so you can get back on track fast.
- If your screenshot is not saving →
Check your save location in the Screenshot Toolbar (Options > Save to). Files often go to Desktop or Documents.
- If shortcuts are not working →
Go to System Settings > Keyboard > Shortcuts > Screenshots and confirm they’re turned on.
If your shortcuts still don’t respond, check your macOS version. Features like the Screenshot Toolbar only work on macOS Mojave or newer. A quick update often solves the problem.
- If the thumbnail is missing →
Re-enable it in the Screenshot Toolbar under Options > Show Floating Thumbnail
- If screenshots are in the wrong format or are large files →
Open the screenshot in Preview, then go to File > Export to choose JPG, PNG, or PDF and reduce file size.
- If file is not appearing →
Search “Screenshot” in Spotlight to confirm it is saved. Sometimes, it’s just in another folder.
Power Tip: Creating a dedicated Screenshots folder helps you stay organized and avoid cluttered desktops.
Once these small settings are fixed, your screenshots will save exactly where and how you want them.
Conclusion
Now you know every way possible to capture your Mac screen:
Shift-Command-3
Shift-Command-4
Shift-Command-5
You’ve also learned how to edit, organize, and upgrade your screenshots using built-in tools and pro software.
Let’s test one shortcut right now so you make sure it sticks. Try the toolbar, change your save location, or add quick annotations. Each small habit you build leads to faster, cleaner, and more professional screenshots.
FAQ
How do I take a screenshot on a Mac?
Press Shift-Command-3 for a full screen capture
Press Shift-Command-4 to capture a section of the screen
Press Shift-Command-5 for more options and screen recording
Where do Mac screenshots save?
Automatically they are saved to your Desktop. You can change this in the:
Screenshot Toolbar → Options → Save to or through Terminal commands
How to snip a screenshot?
Press Shift-Command-4 → drag to select the area you want → release to capture
Your screenshot saves to the Desktop or chosen folder. Click the thumbnail to edit, crop, or annotate. Alternatively you can use:
Shift-Command-5 → Capture Selected Portion
for extra options like a timer or save location.